How to Build a 4-Wheel 3D-Printed Robot
Meet the ProtoRover — a four-wheel-drive, 3D-printed rover you can design and build entirely from your browser. In this guide you'll design it, wire it, simulate it driving, then print and build it for real using the free online DIGINTO Robot Designer.
What you'll build
The ProtoRover is DIGINTO's beginner prototype robot: a compact 4-wheel-drive rover built on a 3D-printed 20×20 frame, driven by two motors through an ESP32 controller. It's the perfect first robot — small, cheap to print, and simple to wire — and the best part is you design and build the whole thing online, with no CAD skills required.
Everything in this guide happens inside the free DIGINTO Robot Designer — the same browser tool shown in the screenshots below. Design the frame, wire the electronics on a 3D breadboard, check the schematic, simulate the robot driving, then export the printable parts and build it on your bench.
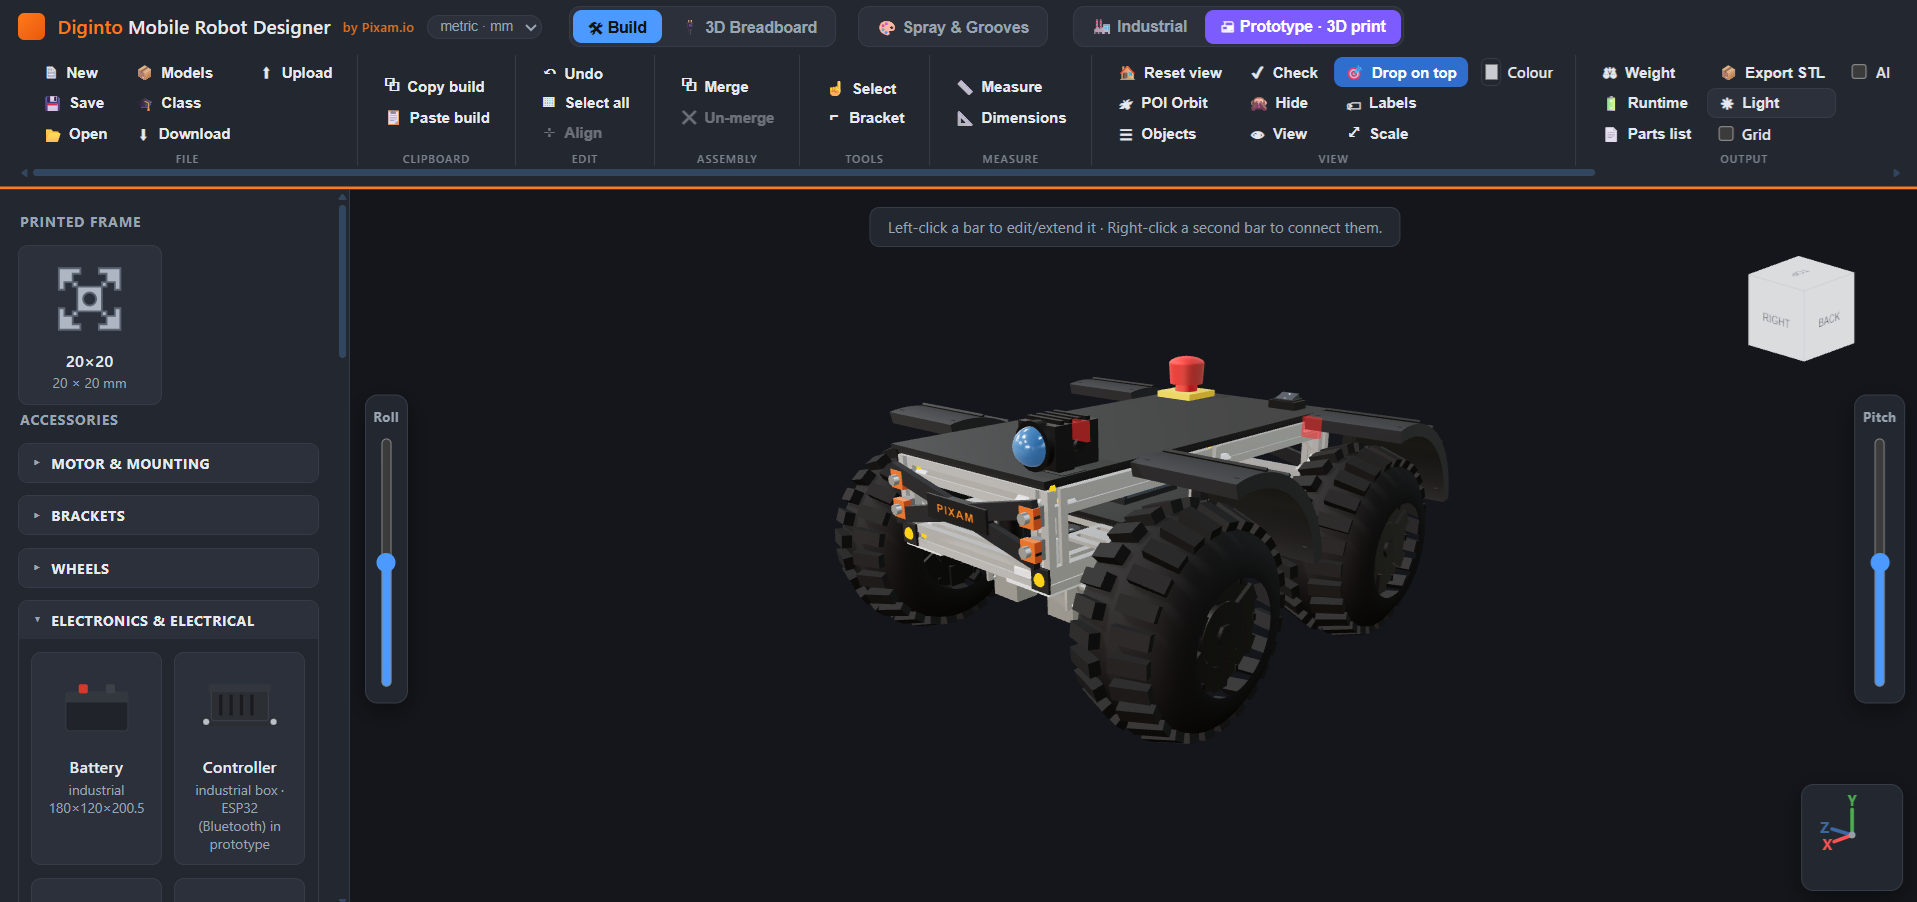
1Design the rover in the Robot Designer
Open the Robot Designer and start a Prototype · 3D-print build. The ProtoRover is already available as a ready-made model — open Models and load it, or build your own frame bar-by-bar. Add the printed 20×20 frame, the four chunky wheels, motors, the battery and the ESP32 controller from the parts panel, and the Designer keeps a live weight estimate and parts list as you go.
2Wire it on the 3D breadboard
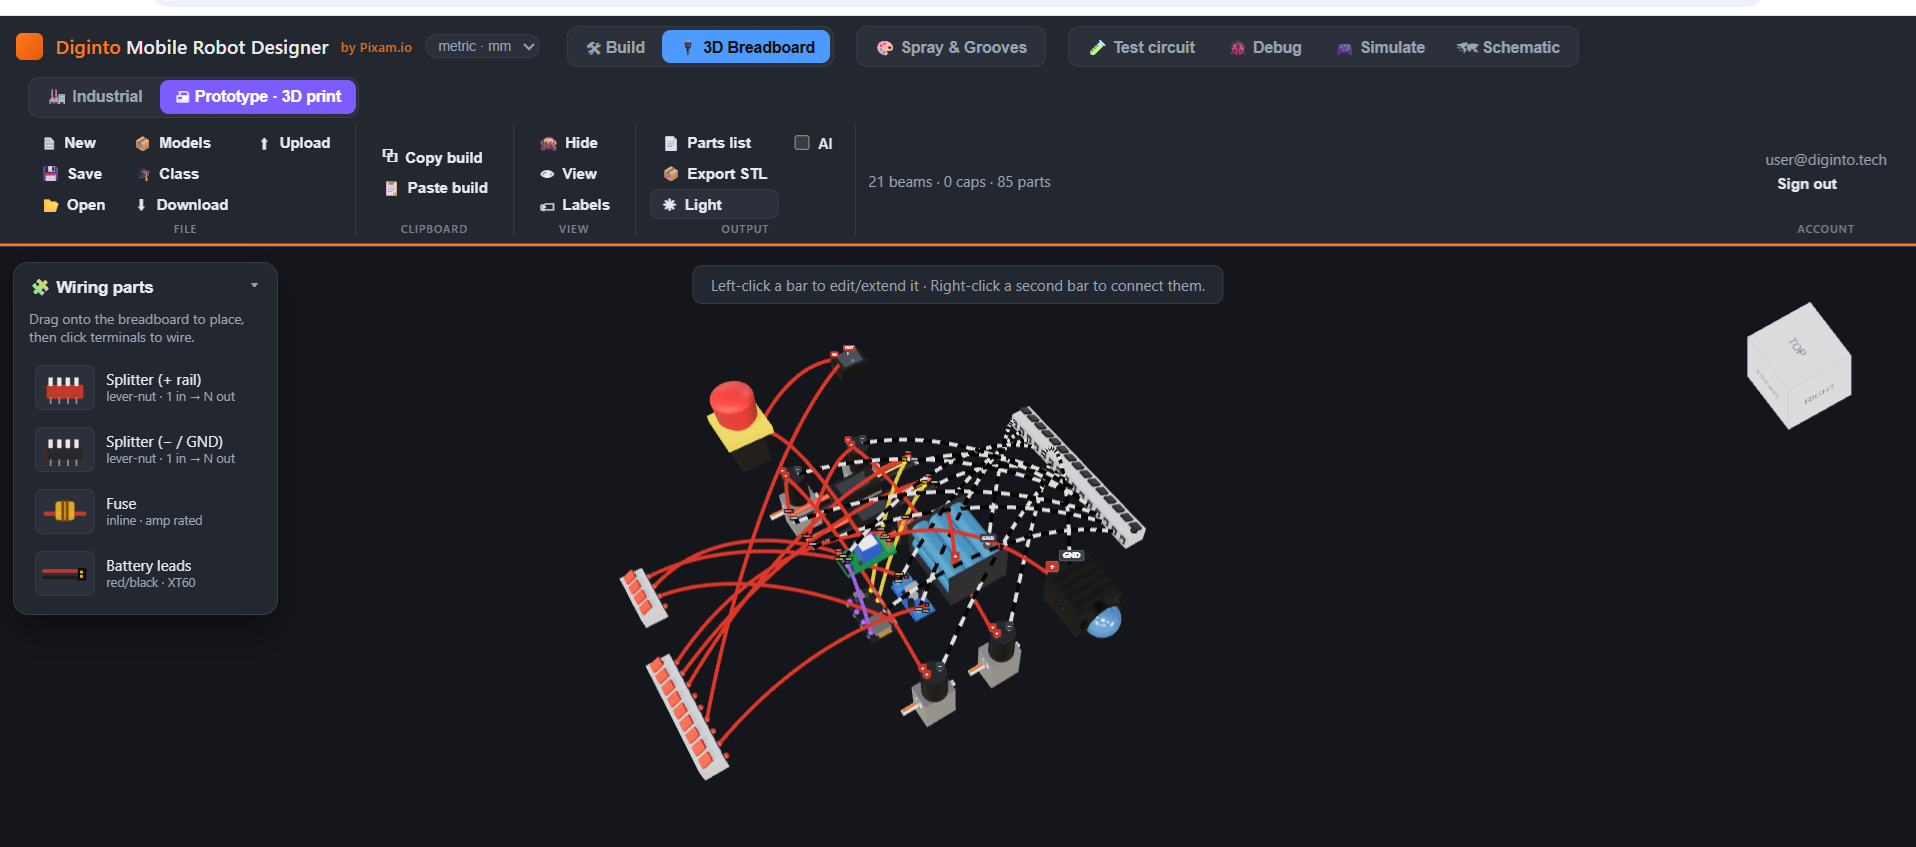
Switch to the 3D Breadboard tab and wire the robot up in three dimensions, exactly as you would on the bench. Drag wiring parts — power and ground splitters (lever-nuts), an inline fuse, battery leads — onto the board, then click terminal to terminal to run the wires between the battery, ESP32, motor drivers and motors. It's a safe place to get the wiring right before you cut a single real wire.
3Check the schematic
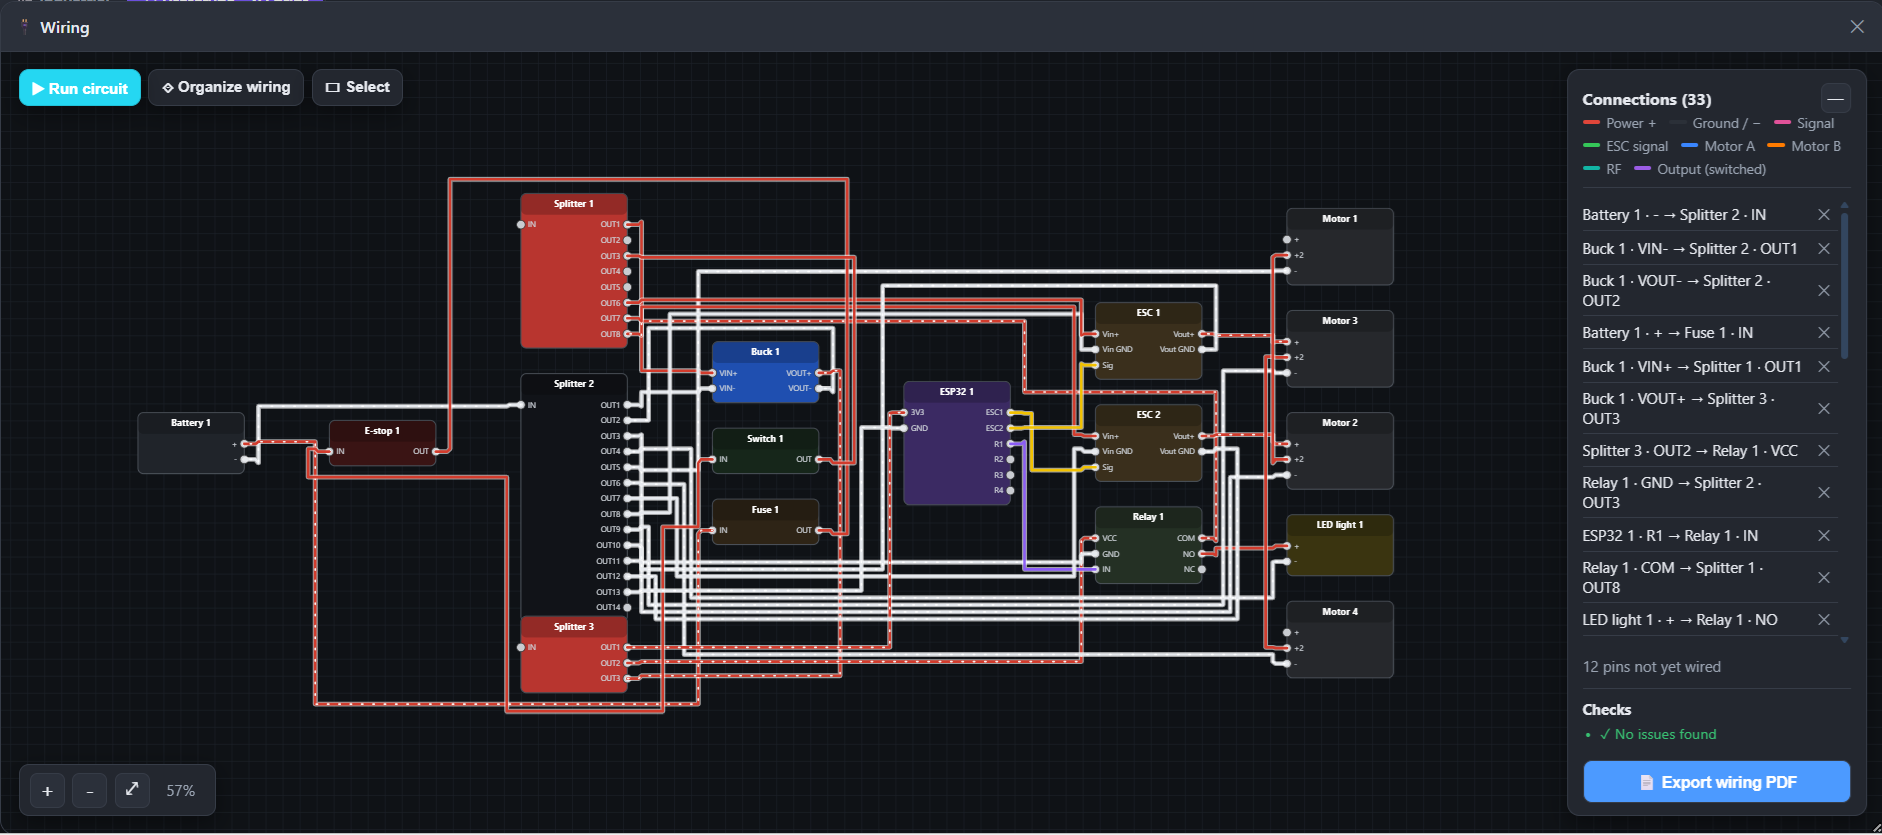
Open the Schematic view to see your wiring as a clean, colour-coded circuit diagram — power, ground, signal, motor and RF nets all drawn out, with a live list of every connection. Hit Run circuit to have the Designer check it for mistakes (it flags anything unwired or shorted), and when it reads "No issues found" you can Export the wiring as a PDF to follow while you build.
4Simulate the drive
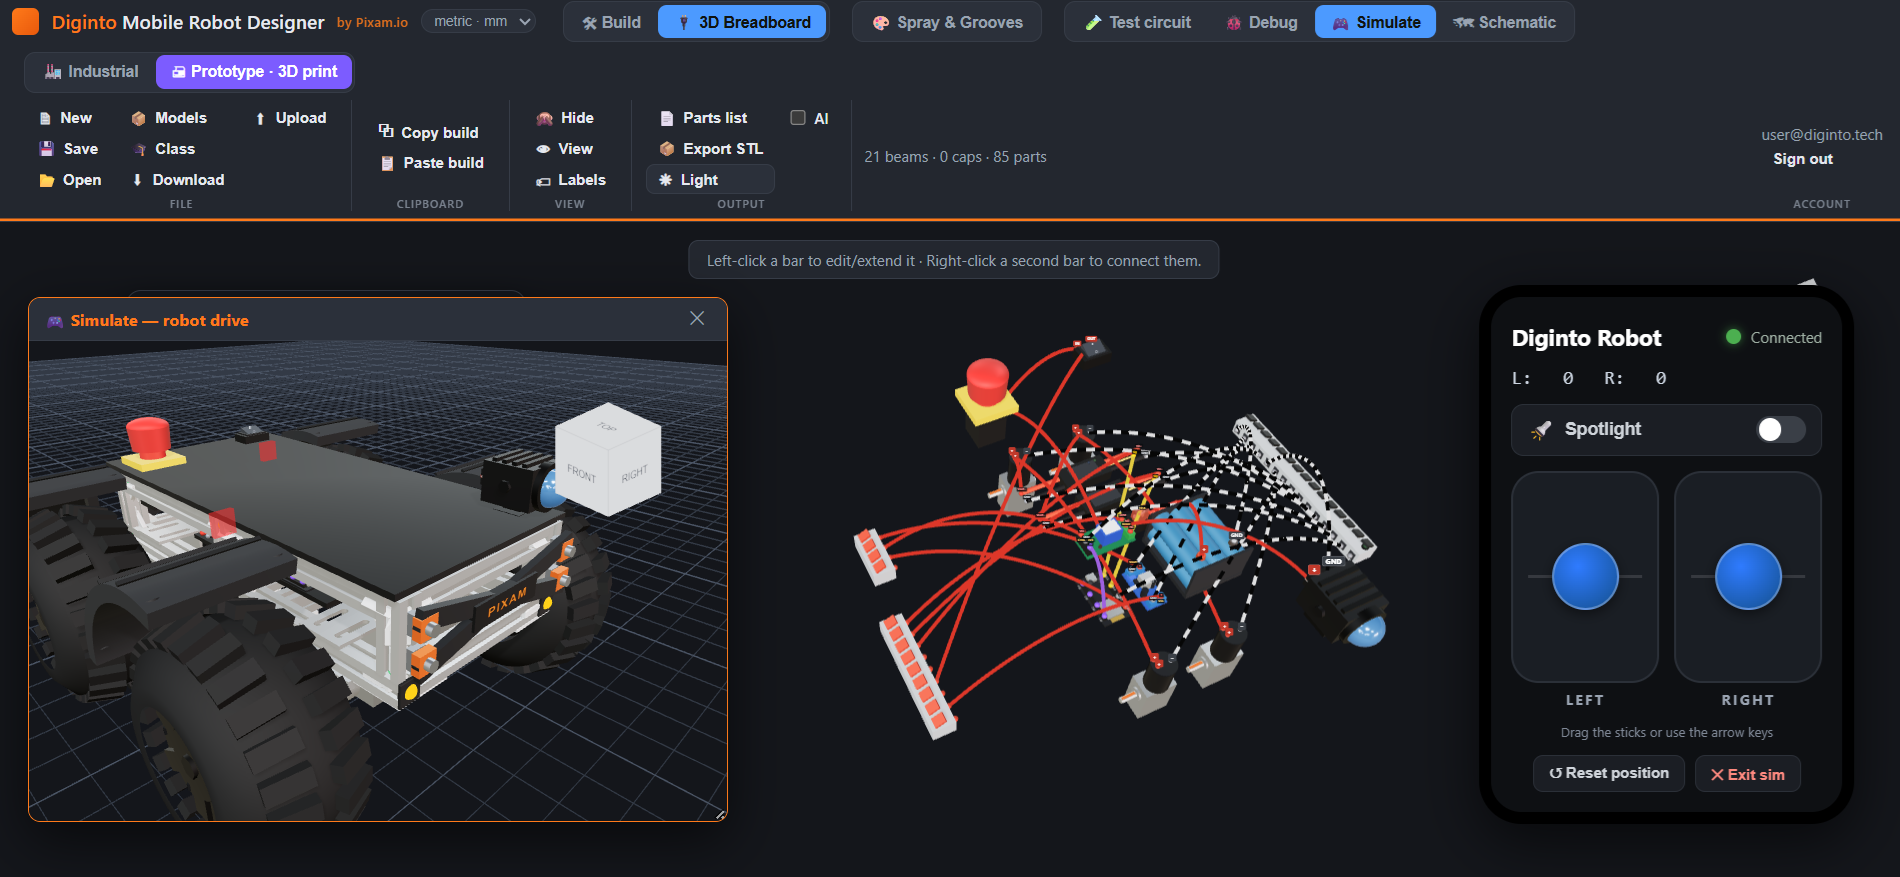
Before you build anything, press Simulate and take the rover for a test drive. The Simulate tool brings your wired design to life: an on-screen controller connects to your virtual robot, and you drive it with the left/right sticks (or the arrow keys) to see the motors and wiring actually working. It's the fastest way to confirm your design behaves the way you expect — all in the browser, with zero hardware.
5Print it and build it for real
Happy with the design? Use Export STL to download the printable frame parts and send them to your 3D printer, and open the Parts list for everything you need to buy. Then assemble the frame, mount the motors and wheels, and wire the electronics following the schematic PDF you exported in step 3. Because you already designed, checked and simulated it online, the real build is just a matter of following your own plan.
Ready to build your ProtoRover?
Open the free Robot Designer and start your 4-wheel build in the browser.
Tools used
- Build view — design the 3D-printed frame.
- 3D Breadboard — wire the electronics in 3D.
- Schematic — check the circuit, export wiring PDF.
- Simulate — drive the robot virtually.
- Export STL — print the parts.